No-Knead Sourdough: Bread in Translation Part 2
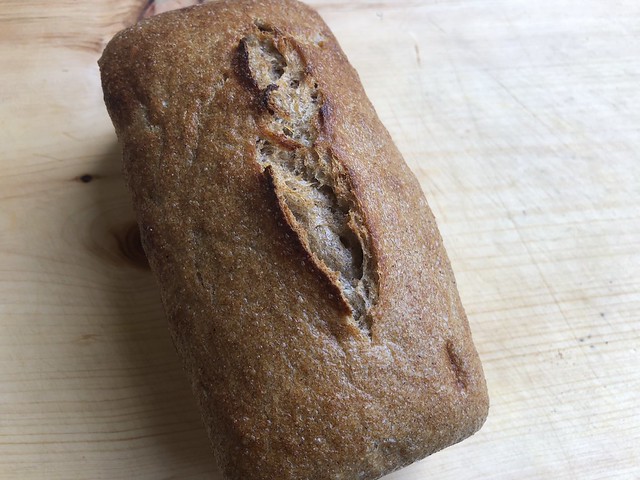
Following on from Part 1, here is a recipe for a basic sourdough bread. Ounce conversions given are for weight measurement, not for volume: please do not use a measuring cup for this recipe. If a regular yeasted dough is preferred, 5g (1tsp) of traditional dried yeast dissolved in 2 tablespoons of water can be substituted for the sourdough starter, and proceed as in the recipe. Do not attempt a long, slow fermentation with fast-acting or instant yeasts: these yeasts are intended for use in a bread machine, and do not have the stamina for proving over several hours. The recipe makes one good sized loaf, that fits in a 5 quart (5.5L) casserole pan or a 1kg(2lb) bread tin; for a 3 quart (3.5L) casserole or pound cake tins, the dough should be divided in two after the bulk proof.
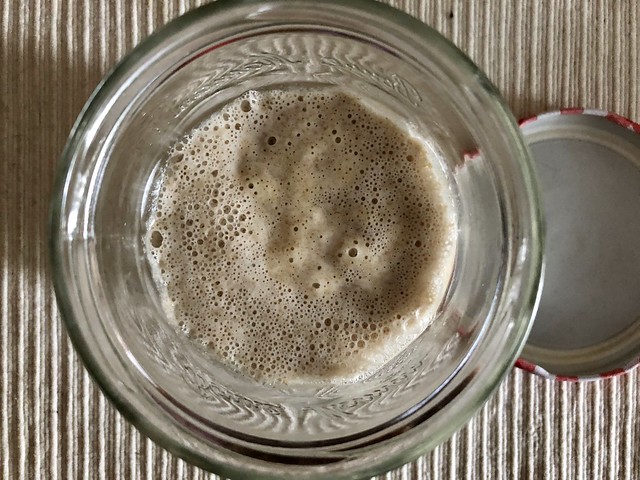
It is important to note that a sour starter must be active to be effective. If the starter is normally kept dormant in the refrigerator, it needs to be brought back to room temperature and fed before it can be used for baking. Once the starter is revived and bubbling away, it should, ideally, be fed a second time, and allowed to bubble away again before it is mixed into your dough.
No-Knead Sourdough Bread
Makes 1 loaf
450g/16oz flour (100%)
315g/360g/450g (11oz/12.6oz/16oz) dechlorinated water (70%/80%/100%)
9g/0.3oz salt (2%)
115g sourdough starter (25%)
Autolysis
This step is optional, but it is especially helpful with the bread's structure when there is little to no kneading of the dough. This resting period allows the enzymes to activate and begin the process of breaking down the complex starches in the grain, and developing the gluten strands, all without the intrusion of wild yeasts or lactic bacteria.
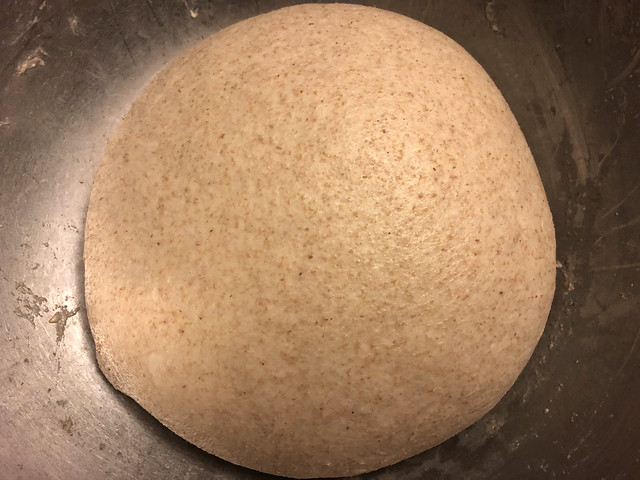
Start by mixing together the flour, salt and water in a large mixing bowl. The general consensus is that salt should be added at the end of the autolysis period, but I tend to forget it, so I add everything together from the beginning. If you prefer to leave the salt out, hold back 50g of the water to dissolve the salt in later.
Mix together until the formation of a rough dough. Be aware that a 70% will result in a fairly stiff dough, but should still be manageable even for someone with little arm strength. However, if the dough feels overly stiff or dry, sprinkle in an extra tablespoon or two of water.
Cover the bowl with a lid or wrap of some sort.
Let sit anywhere from 30 minutes to several hours.

Bulk Fermentation
If the salt was held back from the autolysis, dissolve in 50g of water, and mix in to the dough until thoroughly combined.
Add the sour starter to the dough, and knead in completely. This will be the extent of all the kneading to be done, though a later, optional, step can be added if timing permits.
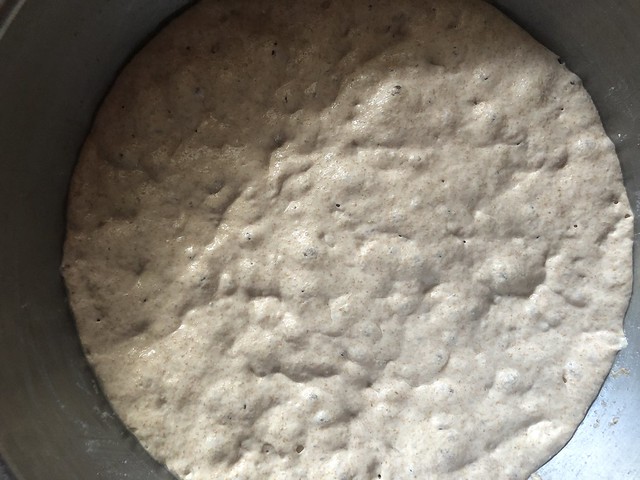
Once the leaven is completely mixed into the dough, cover the bowl, and leave to rest at room temperature.
The length of the bulk fermentation will depend on the room's temperature. Generally speaking, between 18ºC/64ºF and 24ºC/75ºF, it will take about 8 to 12 hours. I usually try to time the bulk proof so that the dough is ready for the next stage either when I wake up in the morning or come back from work in the evening. However, even if the dough over-proves, it is not a dire problem: the resulting loaf will probably not be at its best, but it will still beat supermarket bread, hands down.
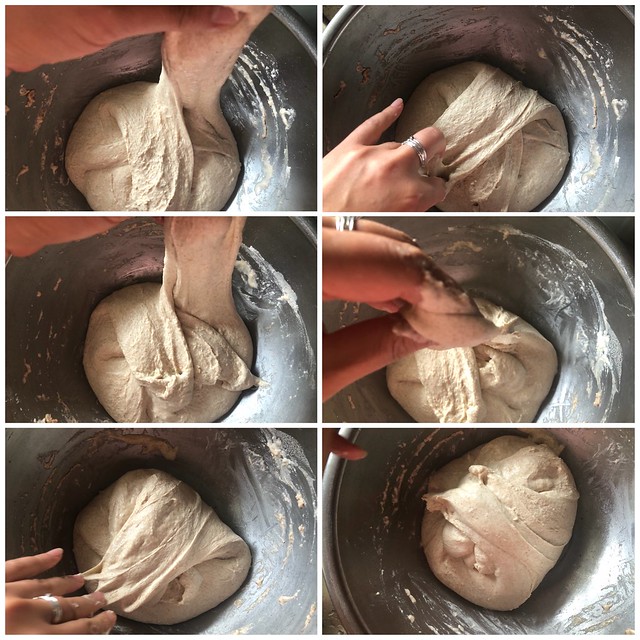
 If your schedule permits, a gentle kneading, also called 'stretch and fold,' can be performed 30 minutes into the bulk fermentation. Slide your hand under the middle part of the dough, and lift away from the bowl. Fold the dough back onto itself, give a quarter turn to the bowl, and repeat three more times. This process should be done with wet hands to prevent the dough from sticking to your hands: keep wetting hands as and when needed. Repeated every 30 minutes, for up to six times if timing allows.
 All bakers seem to agree that it is important to create tension on a single side of the dough: the top-side of the dough usually becomes the outer surface of the final loaf of bread, and thus, these are the gluten strands that need to be given the most elasticity. Do not flip the dough willy-nilly, unless needed as in the stretching technique described below.
If, however, your dough is very soft and fragile, pulling and tucking may be a better way to work out the dough. This consists in pinching a corner of the dough, pulling it out as far as possible, and tucking the end into the centre or just beyond. Give the bowl a quarter turn, then repeat three more times, or until the dough feels somewhat firmer. As with the stretch and fold, this should be done with wet hands. Finally, the ball of dough should be gently eased out of the bowl, and flipped over; when the times comes for the next stretching session, flip the dough over again, and proceed as before. Flipping the dough over ensures that the outer surface of the loaf gets all the stretching.
Dividing and Shaping
It can be difficult to judge when the bulk proof is done: dough does not always double in size, especially if it's made with whole wheat flour. Some signs to look for: removing the lid from the bowl releases a tangy whiff; the dough should look visibly relaxed - give the bowl a gentle shake, the dough should wobble or jiggle; some air bubbles may be visible on the surface of the dough; the dough's surface should look glossy and taught. Sometimes, especially on warmer days, the dough may look craggy and knobbly, a little like a deflated balloon, it may even appear much more runny than you remember, and distinctly sour and alcohol smell may emanate from the dough: these are signs that the dough has over-proofed. It happens, and it's not the end of the world.
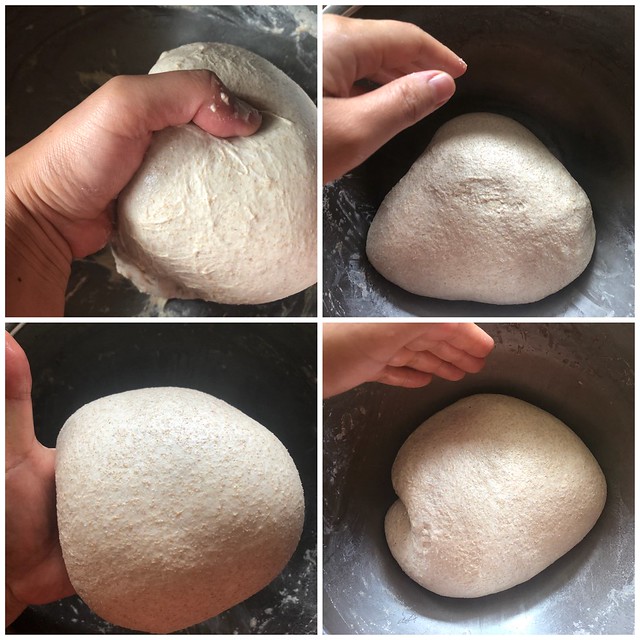
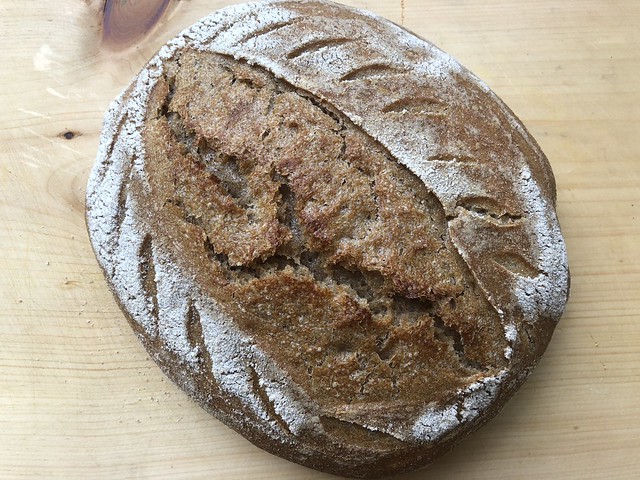
Overproved doughs will have a weakened gluten structure, therefore it may be preferable to bake them in a mould rather than baking them free-form. Before setting any dough for its final fermentation, the gluten structure needs to be given a little boost: tighten the dough by making a series of 'stretch and folds' or 'pull and tucks' until the dough form a proud(-ish) ball of dough. Leave the dough to rest top-side up on a lightly floured surface.
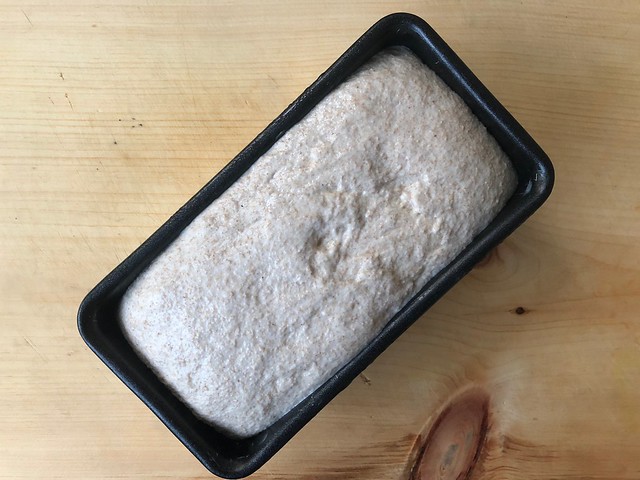
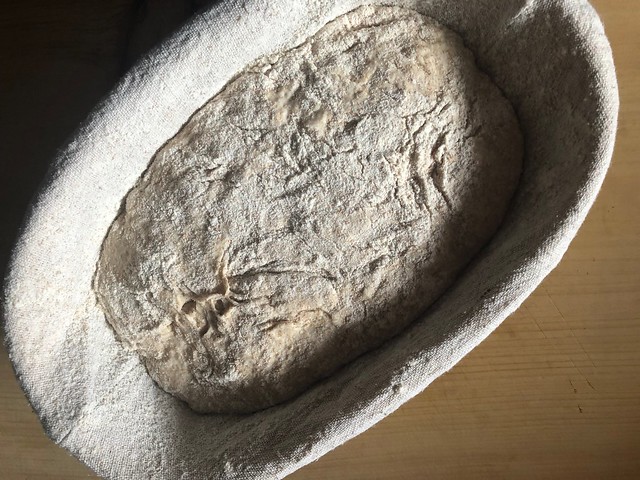
Meanwhile, prepare a baking tin/proving basket/baking sheet: baking sheets (for proving free-form dough) and baskets should be lightly floured, bread tins need to be greased. Lightly flour the top of the dough, flip over, and further tighten the dough with a series of 'pull and tucks.' When the dough is as tight as it will get, pinch together the seam to prevent the dough from splaying out. Place top-side up in the bread tin or on the baking sheet, upside-down in the proving basket. Lightly flour the dough and cover with a clean cloth.
Final Proof
The final proof should take about half as long as the bulk fermentation, if it is done at the same temperature. This timing may or may not work with your schedule: one way to fit the final proof in your day is to slow down the second proof, also called a retard -French for delay. This simply implies that the dough is left to ferment in the refrigerator. The yeasts will continue to work until the core of the dough becomes too cold for them; some of the lactic bacteria will continue on even in the cold, so long retards (anything beyond 24 hours) will result in distinctly sour bread -which may or may not be desirable. Cold proved dough should be baked straight from the fridge.
Baking
Pre-heat the oven to 250ºC/480ºF. If baking in a casserole, place it in the oven to pre-heat: cast iron casserole take a long time to heat through, depending on how reliable your oven, wait 30-60 minutes after the oven reaches the right temperature before proceeding. Bread tins can go straight into the oven when hot. Free-form loaves can go in the oven on the same baking tray they proved on. Dough that fermented in a basket need to be gently flipped out onto a baking sheet or a piece of baking parchment if they are to be transferred into a pre-heated casserole.
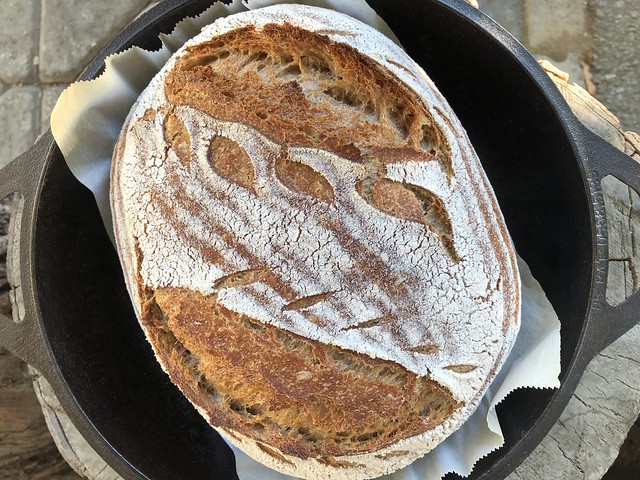
Scoring the dough is not only decorative, it also gives the dough some room to get extra lofty. As it can be daunting the first few times, loaves can be left unscored and allowed to crack where they will. Carefully transfer the dough into the pre-heated casserole, if using, by lifting the edges of the parchment paper and lowering the dough into the pot. Cover the pan and return to the oven. Bake the bread for 30 minutes, remove the lid to the casserole, lower the oven's temperature to 190ºC/375ºF, and bake for a further 15 to 20 minutes, or until the bread is a lovely burnished brown.
Allow to cool down for at least 30 minutes before slicing into the loaf, and remove the bread from the tin as soon as it is cool enough to handle. This waiting period is necessary to finish off the cooking process, cut into it too soon and the crumb will be wet and gummy. Occasionally, the dough will have other things in mind and will stubbornly refuse to rise up, preferring to spread wide... It happens, especially with the wetter doughs, and on sweltering days. Increasing the number of stretching sessions may improve the bread's loftiness. Nevertheless, if the dough refuses to bake into a handsome loaf, baking in a bread tin is always an option, as is cheating with the leaven: adding a quarter to a half teaspoon of commercial dried yeast is sometimes helpful. And don't give up! Try and try again, keeping notes on any changes you may attempt, whether it is the hydration level or the flour brand. Practice makes better!
As always, please leave any questions in the comment box below.
Happy Baking and Bon App'!


Comments
Post a Comment